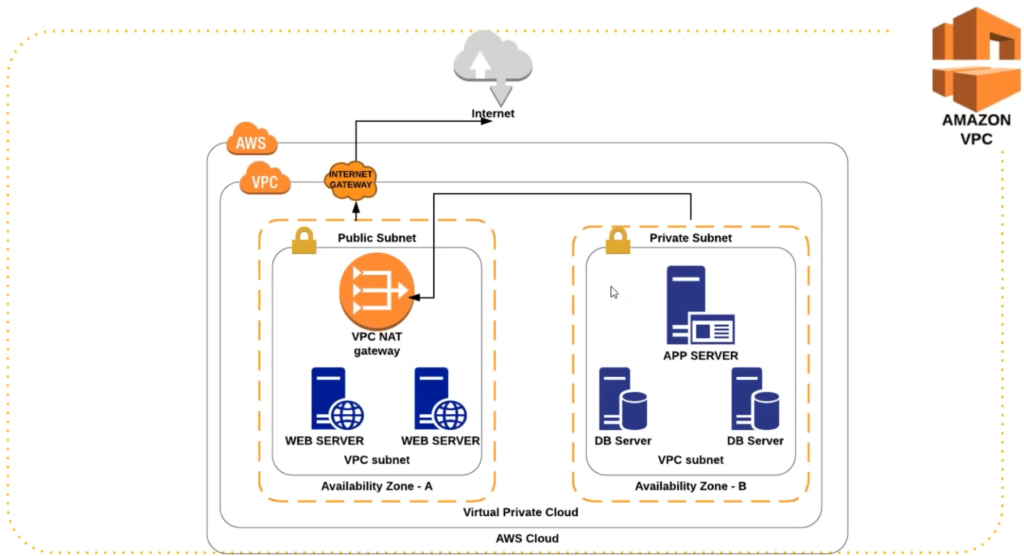
The above diagram is the network architecture of a VPC. VPC will have 2 subnets – public subnet and private subnet. This concept is specifically fir VPC and not a general network concept.
Here public subnet would be connected to a Internet Gateway. You can consider Internet Gateway as a modem which will help the traffic to go out to the internet and vice versa. Here machines available inside the public subnet can connect to the internet.
You cannot connect machines available inside the private subnet to connect to the internet. However, if you wish to download something(packages) from the internet, you should be able to download it. Right ? There is a provision available in the private subnet ot connect to the internet. For that we need to place a NAT Gateway inside the public subnet. Private subnet would connect to the NAT Gateway, whcih further connects to the Internet Gateway. Unlike the public subnet, private subnet only allows traffic to go out to the internet.
If you wish to login to machines available inside private subnet, you cannot do that. To perform this task, you need to login to the machine inside the public subnet and from there you can do a ssh to the private subnet or you can use a VPN tunnel.
Points To Remember
- Network Address Translation(NAT) gateway to enable instances in a private subnet to connect to the internet or other AWS services
- An internet gateway is a horizontally scaled, redundant and highly available VPC component that allows communication between instances in your VPC and the internet
Previously, we were discussing about the security. Now, let’s deal with high availability. Let’s say if the availability zone for the private zone goes down/is slow. Then what should we do ?
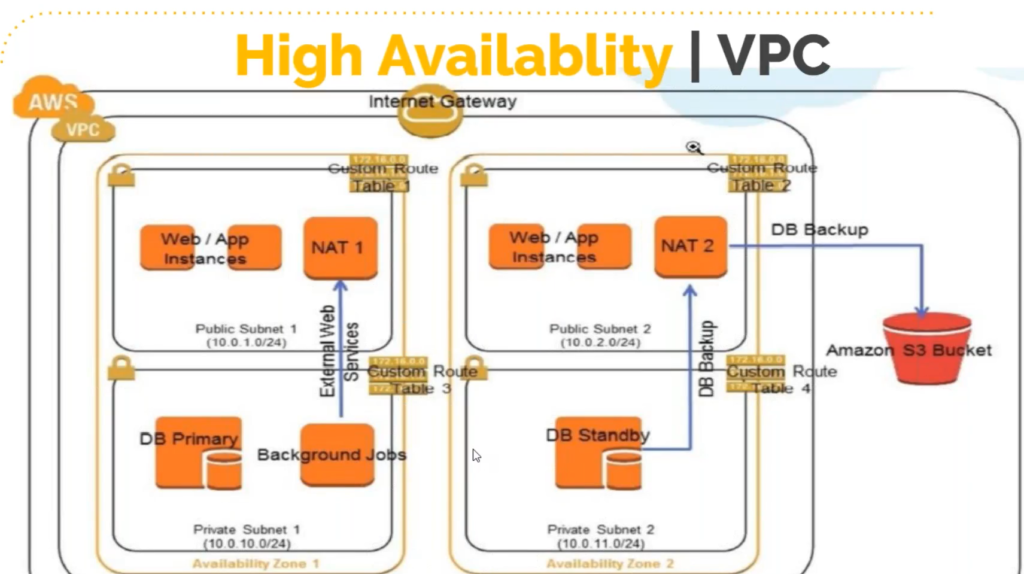
For high availability we place atleast 2 public and 2 private subnets in different zones as shown in the diagram above.
Routing of the traffic is decided by the ROUTE TABLES, which will decide that traffic will go the the NAT gateway or the Internet gateway. Route tables are mapped to the subnets. If the traffic is going out to the NAT gateway, that becomes the private subnet and if the traffic is going out to the Internet Gateway that becomes the public subnet.
Things to be considered while creating a VPC:
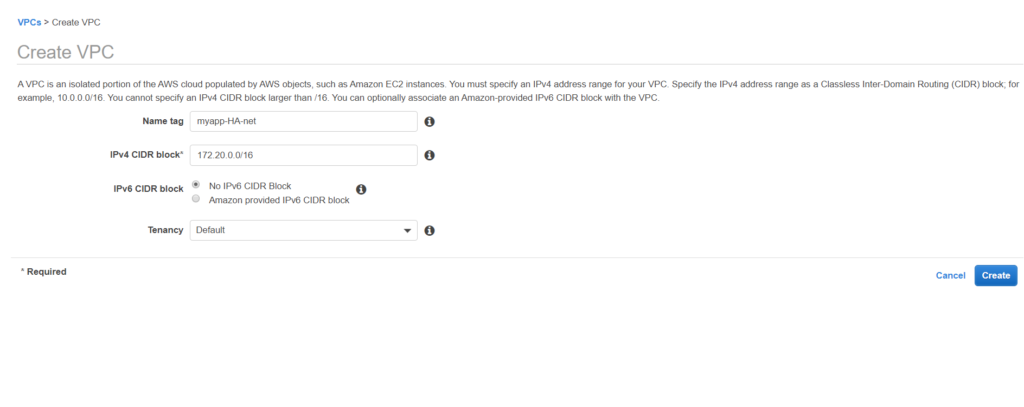
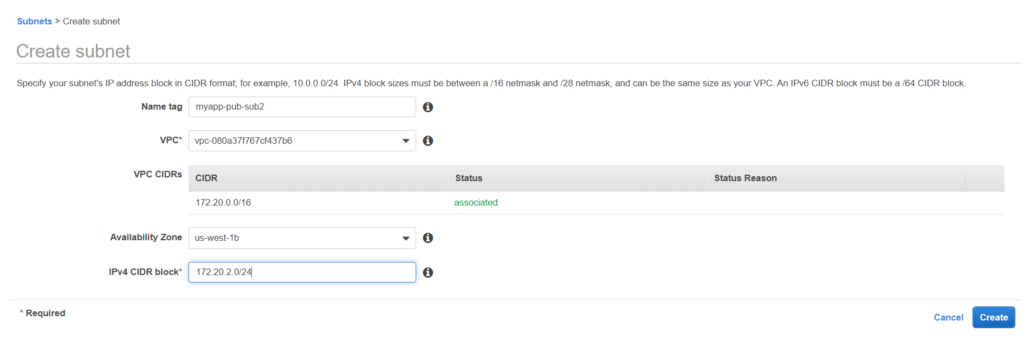
- VPC Range: For example 172.20.0.0/16
- Public Subnet 1: For example 172.20.1.0/24
- Public Subnet 2: For example 172.20.2.0/24
- Private Subnet 1: For example 172.20.3.0/24
- Private Subnet 2: For example 172.20.1.0/24
- 1 Internet Gateway
- 1 NAT Gateway(you can take 2 for high availability)
- 2 route table – 1 for public subnet, 1 for private subnet
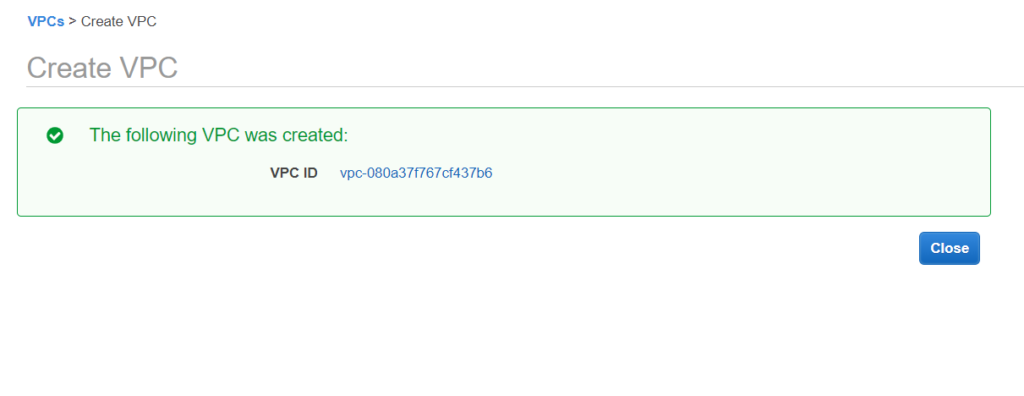
Creating a VPC
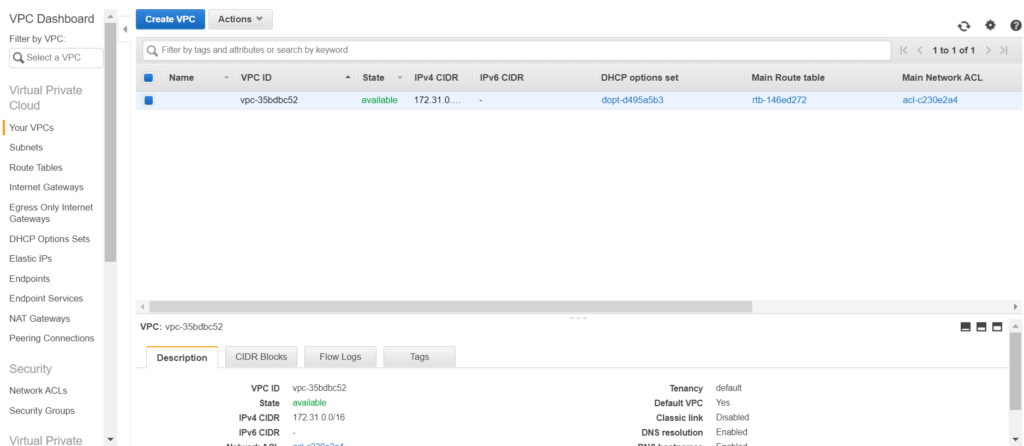
As you open your AWS VPC section, you will notice a default VPC. Every vpc/elb or any other thing we create in this region will be created under the default vpc.
Let’s create subnets now, both public and private as per the zones decided previously.

Now we need to attach an Internet gateway to our VPC as the route tables will tell the traffic to go to the Internet gateway. Creating a Internet Gateway.

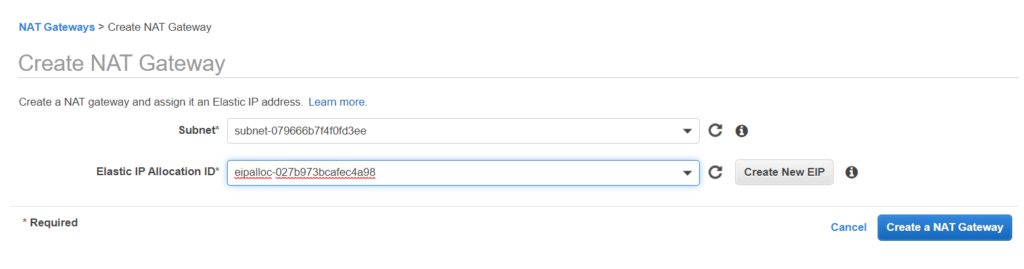
Its time to create a NAT Gateway. Please keep in mind that creating a NAT gateway would be chargeable. So refrain it for using it for long hours if you are practicing. But before creating a NAT gateway we would require a Elastic IP.

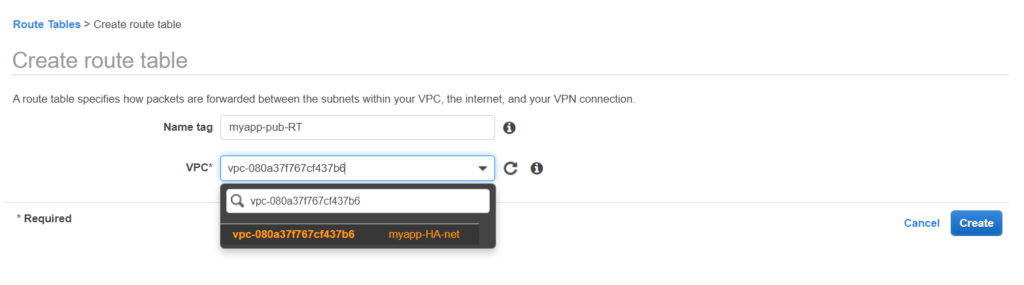
What makes a subnet public or private are actually the route tables. So let’s get into action again and create the route tables. Route table routes the traffic going out of the subnet. Creating a route tables now.
Now let;s define the routes for this Route Table.
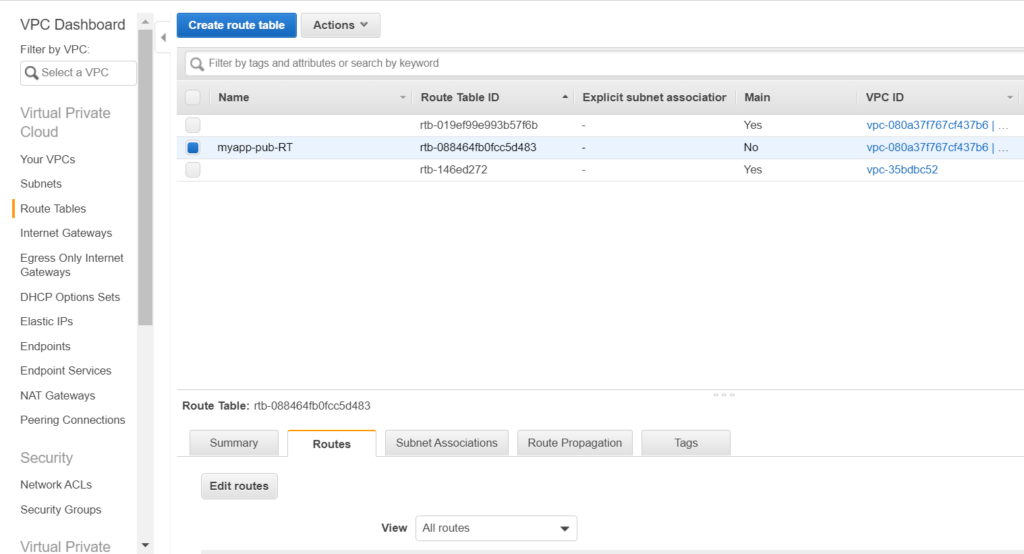
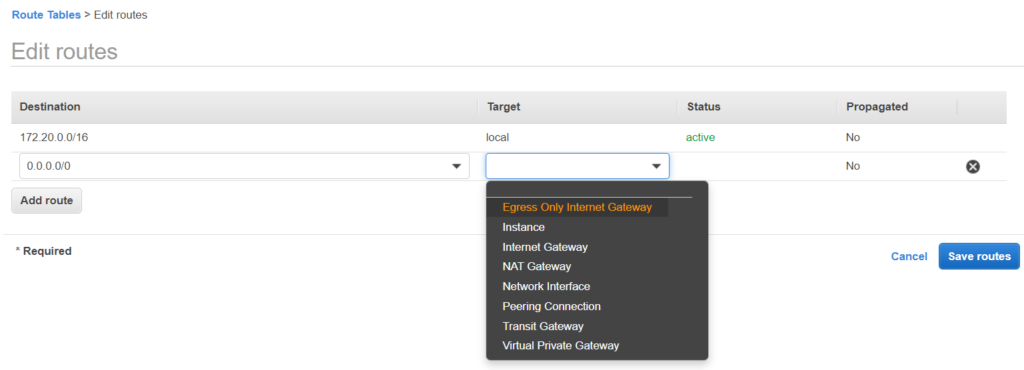
As you can see there is a default route. If there is a intercommunication between the subnets, for example jenkins connecting to nexus. If the destination belongs to the VPC range then the traffic is routed locally.
Anything else, apart from above will go the the Internet Gateway i.e to google or anything. This route table is for the public subnet.
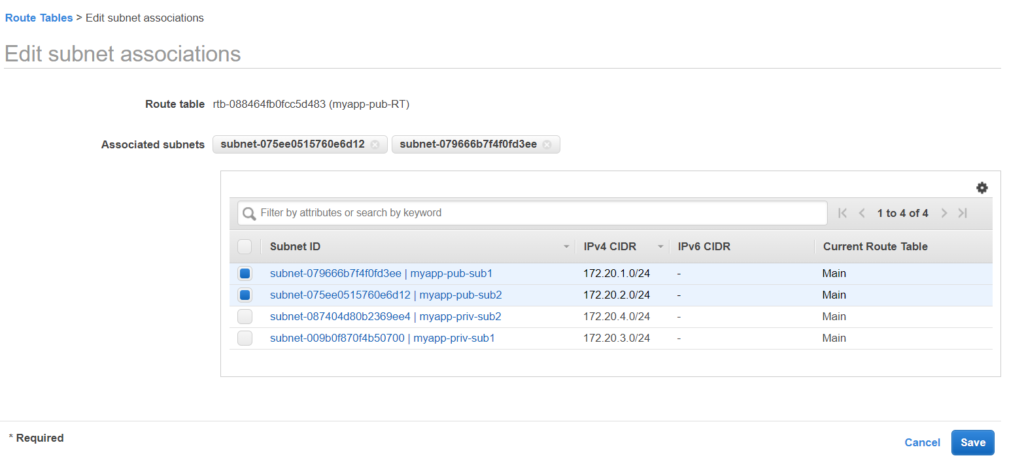
Now let’s associate with the public subnet.
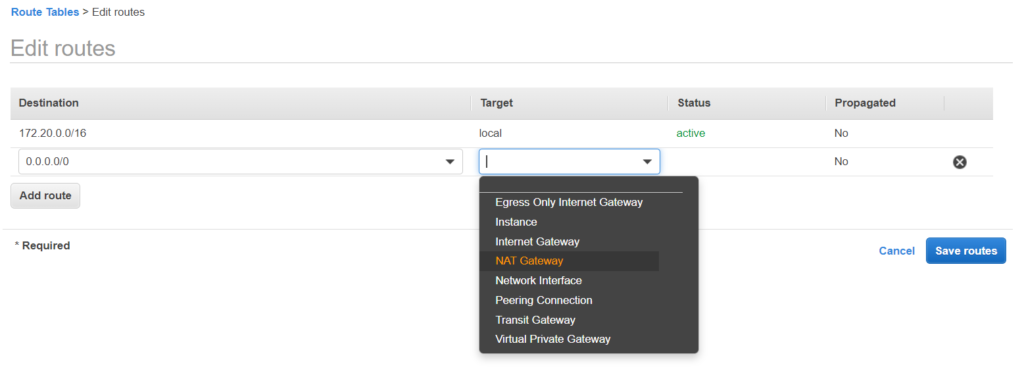
Similarly let’s create a route table for the private subnet. The only difference will be that the traffic will be routed to the NAT Gateway here instead of the Internet Gateway.
And its done. So we have created a highly available and a secure network.

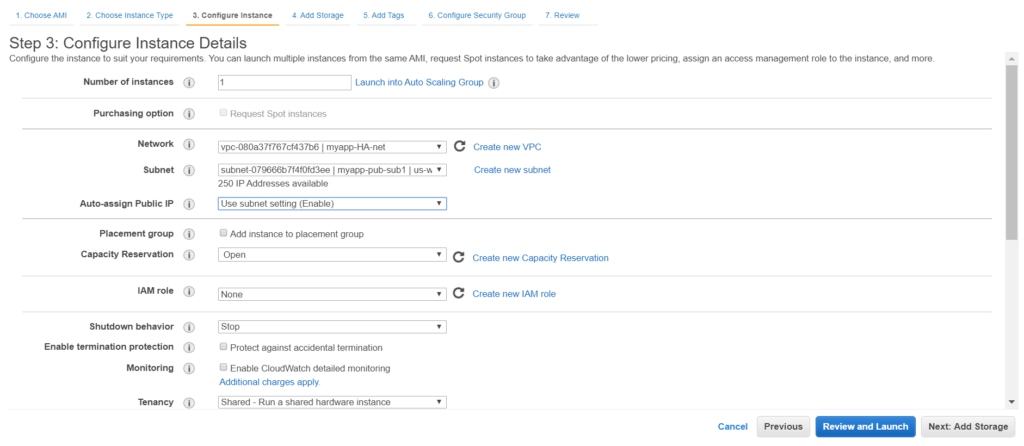
Now we can place our instances in the VPC. Let’s do that. But before doing that let’s do some settings.
- Allocate public IP to public subnet
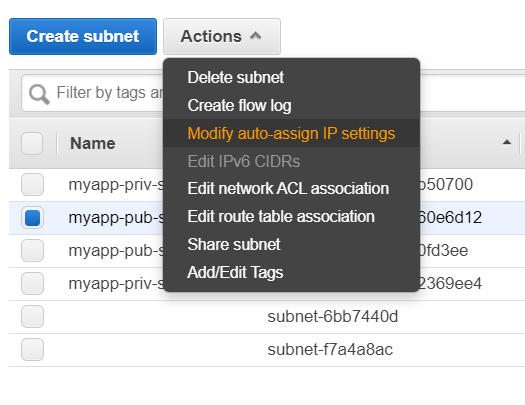
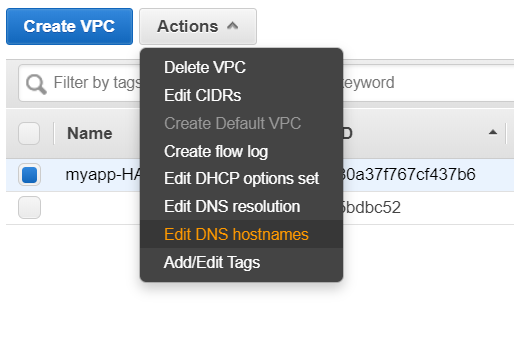
- When we create a instance, our instance gets a public IP it also gets a public DNS name. So let’s enable that in VPC.
Now let’s create a instance inside this subnet.
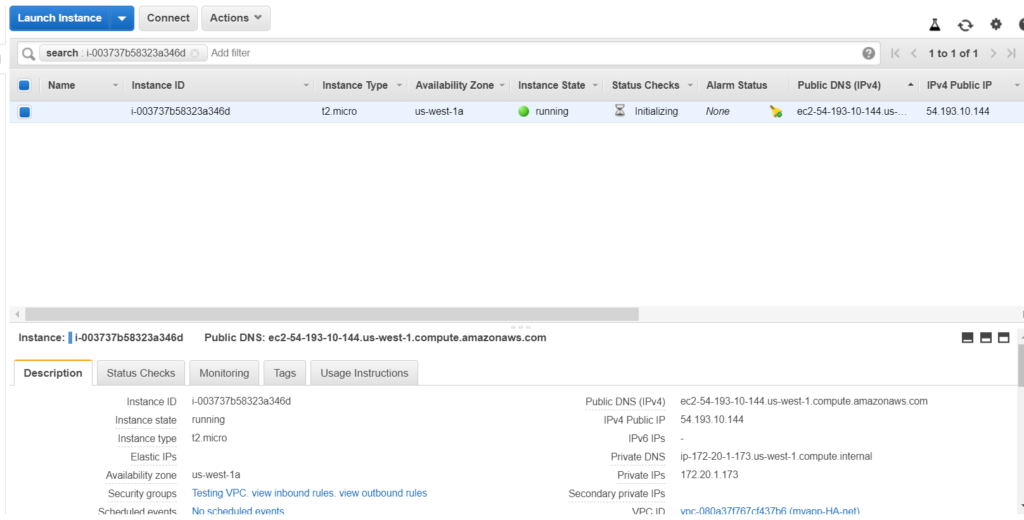
Let’s try to connect to this instance now.
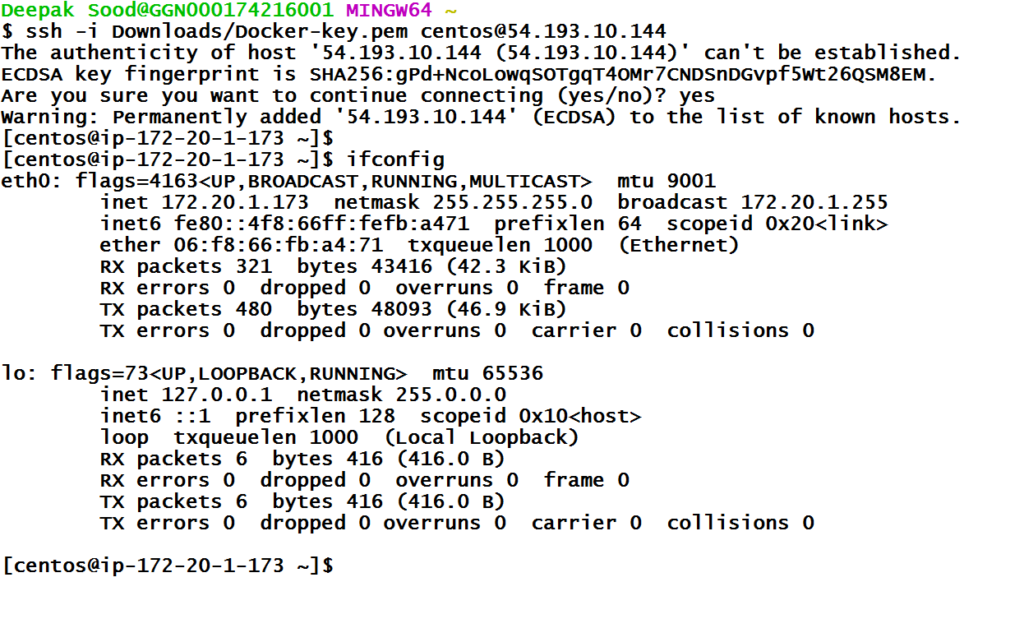
You should be able to successfully login.