Bash scripting is used by many of the system admins and DevOps geeks to get things done quickly and efficiently. There are so many automation tools in the market like Ansible, Puppet, Chef etc. Which are way more sophisticated but sometimes to get things done quickly in Linux systems we use Bash scripts. Also, scripting will make you understand what automation means and then you can quickly grasp the features that is used in Configuration Management tools like Ansible or puppet.
What are scripts?
A Bash script is a plain text file which contains a series of commands. These commands are a mixture of commands we would normally type ourselves on the command line (such as ls or cp for example)
Anything you can run normally on the command line can be put into a script and it will do exactly the same thing. Similarly, anything you can put into a script can also be run normally on the command line and it will do exactly the same thing.
First Script
As we discussed earlier that script is a normal text file with commands in it. We will open a file vi editor and add some commands in it. It is convention to give files that are Bash scripts an extension of .sh
vi print.sh

#!/bin/bash

#sample bash script

echo Hello World!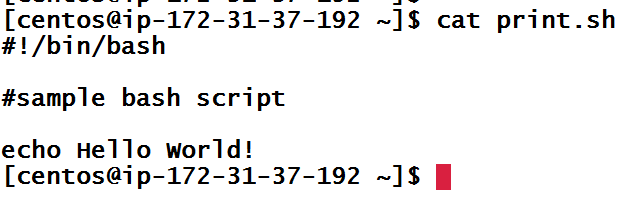
Line 1 – #! is called as the SHEBANG character, it tells the script to interpret the rest of the lines with an Interpreter /bin/bash. So, if we change that to /usr/bin/python then it tells the script to use python interpreter.
Line 2– This is a comment. Anything after # is not executed. It is for our reference only. Comments is for us so or anybody who reads this script will have some reference.
Line 3– Is the command echo which will print a message to the screen. You can type this command yourself on the command line and it will behave exactly the same.
Running or Executing a script?
Before we can execute a script, it must have the execute permission set. If you forget to grant this permission before running the script you’ll just get an error message “Permission denied” . Whenever you create a file in Linux system by default it will not have an execute permission, this is for security reasons. You make your script executable and then you can run it.

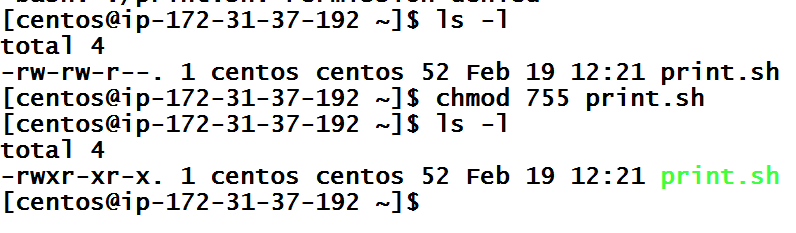
As we have given the permission, its time to execute the script.

And we are successful in getting the output.
Without giving execute permission also we can run the script but then we provide a shell and ask it to run all the command in the script on that shell.
bash ./print.sh
Variables
A variable is a temporary store for a piece of information. There are two actions we may perform for variables:
- Setting a value for a variable
- Reading or using the value for a variable
To assign a variable we use= sign, VariableName=Value
To read/access the value of variable we use $VariableName
[centos@ip-172-31-37-192 ~]$ VAR1=10
[centos@ip-172-31-37-192 ~]$ echo $VAR1
10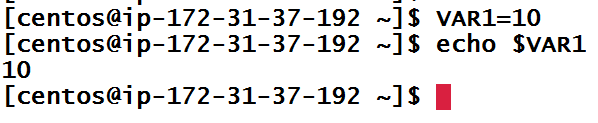
Command line arguments
When we run a program on the command line you would be familiar with supplying arguments after it to control its behaviour.
For instance we could run the command ls -l /tmp. l and /tmp are both command line arguments to the command ls. We can do similar with our bash scripts.
To do this we use the variables $1 to represent the first command line argument, $2 to represent the second command line argument and so on. These are automatically set by the system when we run our script so all we need to do is refer to them. Let’s look at an example.
vi varscript.sh

#!/bin/bash
#A simple copy script

cp $1 $2

#verify if copy worked

echo details for variable 2 are $2

ls -lh $2
[centos@ip-172-31-37-192 ~]$ mkdir dir1 dir2
[centos@ip-172-31-37-192 ~]$ touch dir1/tesla
[centos@ip-172-31-37-192 ~]$ chmod 755 varscript.sh
[centos@ip-172-31-37-192 ~]$ ./varscript.sh
Explanation:
Line 3 – run the command cp with the first command line argument as the source and the second command line argument as the destination.
Line 5 – run the command echo to print a message.
Line 6 – After the copy has completed, run the command ls for the destination just to verify it worked. We have included the options l to show us extra information and h to make the size human readable so we may verify it copied correctly.
Some System Variables
There are a few other variables that the system sets for you to use as well. $0 – The name of the Bash script.
$1 – $9 – The first 9 arguments to the Bash script. (As mentioned above.)
$# – How many arguments were passed to the Bash script.
$@ – All the arguments supplied to the Bash script.
$? – The exit status of the most recently run process.
$$ – The process ID of the current script.
$USER – The username of the user running the script.
$HOSTNAME – The hostname of the machine the script is running on.
$SECONDS – The number of seconds since the script was started.
$RANDOM – Returns a different random number each time is it referred to.
$LINENO – Returns the current line number in the Bash script.
Setting your own variables
[centos@ip-172-31-37-192 ~]$ cat 1_print.sh
intA=20
floatB=20.20
stringA= "first_ string"
DIR_ PATH= "/tmp "
echo
echo "######################### "
echo "Value of integer A is $intA "
echo "######################### "
echo "Value of Float B is $intB "
echo "######################### "
echo "Value of string A is $stringA "
echo "######################### "
echo "Directory path is $DIR PATH"
echo "######################### "
echo "Content of TMP directory ."
echo "######################### "
ls $DIR PATH
Quotes
\Storing a single word in a variable works fine without quotes, but if we want to store a sentence and also want to store special characters like $, %,@ etc our normal variable assignment will not work.

When we want variables to store more complex values however, we need to make use of quotes. This is because under normal circumstances Bash uses a space to determine separate items.
When we enclose our content in quotes we are indicating to Bash that the contents should be considered as a single item.
You may use single quotes ( ‘ ) or double quotes ( ” ). Single quotes will treat every character literally. Double quotes will allow you to do substitution (that is include variables within the setting of the value).
[centos@ip-172-31-37-192 ~]$ myvar='Hello World'
[centos@ip-172-31-37-192 ~]$ echo $myvar
Hello World
[centos@ip-172-31-37-192 ~]$ newvar="This is new variable"
[centos@ip-172-31-37-192 ~]$ echo $newvar
This is new variable
Command Substitution
We now know how to store a string/text into a variable but sometimes you want to store output of a command to a variable. Like you may need to store of ls command output to a variable. For this we use Command Substitution. There are two syntax for doing this.
[centos@ip-172-31-37-192 ~]$ file=`ls`
[centos@ip-172-31-37-192 ~]$ echo $file
1_print.sh dir1 dir2 print.sh varscript.sh
[centos@ip-172-31-37-192 ~]$ files=$(ls)
[centos@ip-172-31-37-192 ~]$ echo $files
1_print.sh dir1 dir2 print.sh varscript.sh[centos@ip-172-31-37-192 ~]$ myvar=$(ls /etc |wc -l)
[centos@ip-172-31-37-192 ~]$ echo There are $myvar enteries in /etc
There are 181 enteries in /etcExporting Variables
Variable defined in the script live with it and dies after the script dies or completes. If we want to define a variable that is accessible to all the scripts from your current shell we need to export it.
Export a variable from bash shell as mentioned below.
[centos@ip-172-31-37-192 ~]$ var1=10
[centos@ip-172-31-37-192 ~]$ export var1
[centos@ip-172-31-37-192 ~]$ echo $var1
10
Create a script which prints exported and local variable
vi script1.sh

#!/bin/bash

var2=20

echo $var1
echo $var2
[centos@ip-172-31-37-192 ~]$ bash ./script1.sh
10
20Environment Variables or Exporting Variables Permanently
To export variables permanently, you can add the export command in any of the following start-up files :
~/.profile
~/.bashrc
/etc/profile
.profile and .bashrc lives in the users home directory so they are accessible only for that user. /etc/profile is for global access for all the variables.
[centos@ip-172-31-37-192 ~]$ cat .bashrc | grep export
#export
GCC_COLORS= 'error=01;31:warning=01;35:note=01;36:caret=01;32:locus=01:quote=01'
export tesla= 'Alternate current'
export EDITOR=vim
export name=Cassini
User Input
While executing the script, we will take input from a user, store it into a variable and then use that variable in our script. We would be taking inputs from user like IP addresses, usernames, passwords or confirmation Y/N, to do this we use command called read. This command takes the input and will save it into a variable.
[centos@ip-172-31-37-192 ~]$ vi input.sh
#!/bin/bash

#Ask the username

echo "Please enter username"

read varName

echo "Welcome $varName"
[centos@ip-172-31-37-192 ~]$ bash ./input.sh
Please enter username
Deepak
Welcome Deepak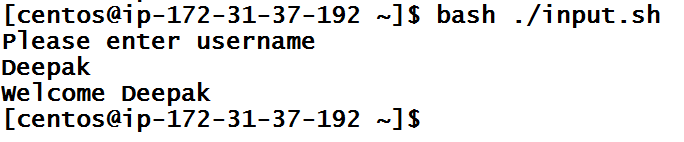
You are able to alter the behavior of read with a variety of command line options. (See the man page for read to see all of them.) Two commonly used options however are -p which allows you to specify a prompt and -s which makes the input silent. This can make it easy to ask for a username and password combination like the example below:
[centos@ip-172-31-37-192 ~]$ vi login.sh
#!/bin/bash

read -p 'Username: ' uservar
read -sp 'Password: ' passvar

echo
echo Thanku $uservar we now have your login details
So far we have looked at a single word as input. We can do more than that however.
[centos@ip-172-31-37-192 ~]$ vi multipleinput.sh
#!/bin/bash

echo Enter your name, profession and age seperated by space

read name profession age

echo Your name is $name
echo Your profession is $profession
echo Your age is $age

Conditions
Basic If Statements
Based on a condition you decide if you should execute some commands on the system or not.
A basic if statement effectively says, if a particular test is true, then perform a given set of actions. If it is not true then don’t perform those actions. If follows the format below:
if [<some tests>]
then
<commands>
fi
Let’s have a look at the example
[centos@ip-172-31-37-192 task2]$ vi ifcondition.sh
#!/bin/bash

if [ $1 -gt 100 ]
then
  echo This is a large Number
  pwd
fi
date
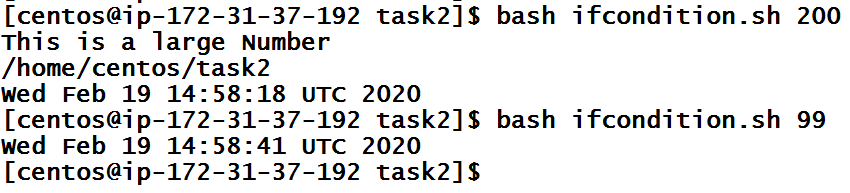
Line 3 – Let’s see if the first command line argument is greater than 100
Line 5 and 6 – Will only get run if the test on line 4 returns true. You can have as many commands here as you like.
Line 7 – fi signals the end of the if statement. All commands after this will be run as normal.
Line 8 – Because this command is outside the if statement it will be run regardless of the outcome of the if statement.
Some expressions that can be used inside the if condition are as below:
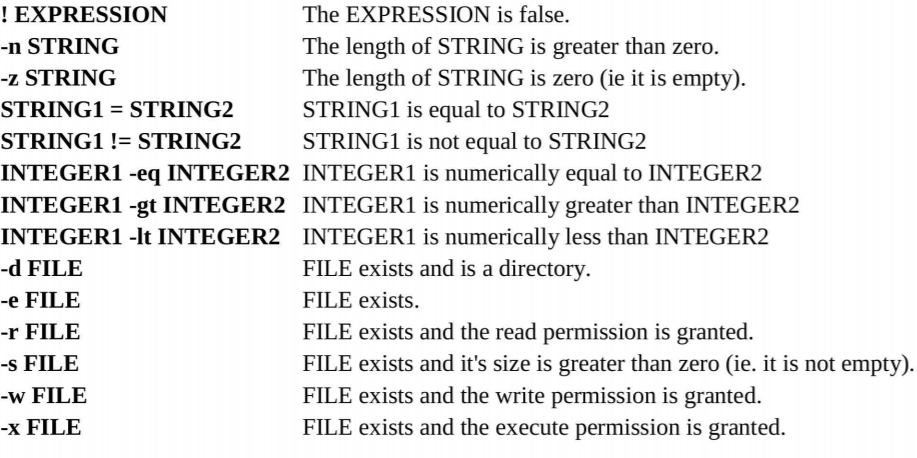
A few points to note:
= is slightly different to -eq. [ 001 = 1 ] will return false as = does a string comparison (ie. character for character the same) whereas -eq does a numerical comparison meaning [ 001 -eq 1 ] will return true.
When we refer to FILE above we are actually meaning a path. Remember that a path may be absolute or relative and may refer to a file or a directory.
Loops
Loops allow us to take a series of commands and keep re-running them until a particular situation is reached. They are useful for automating repetitive tasks.
A ‘for loop’ is a bash programming language statement which allows code to be repeatedly executed. A for loop is classified as an iteration statement i.e. it is the repetition of a process within a bash script. For example, you can run Linux command or task 5 times or read and process list of files using a for loop. A for loop can be used at a shell prompt or within a shell script itself.
for var in <list>
do
<commands>
done
The for loop will take each item in the list (in order, one after the other), assign that item as the value of the variable var, execute the commands between do and done then go back to the top, grab the next item in the list and repeat over.
The list is defined as a series of strings, separated by spaces.
Let’s have a look at the example
The contents of $Variable is printed three times.
[centos@ip-172-31-37-192 loops]$ cat 1_loop.sh
#!/bin/bash

for Variable in {1..3}
do
 echo $Variable
done
Or write it the “traditional for loop” way:
for ((a=1; a<= 3; a++))
do
  echo $a
done
They can also be used to act on files. This will run the command ‘cat’ on filel and file2
[centos@ip-172-31-37-192 loops]$ cat filescript.sh
#!/bin/bash

for Variable in file1.txt file2.txt
do
 cat "$Variable"
done
or the output from a command. This will cat the output from ls.
for Output in $(ls)
do
  cat "$Output"
done
While loop
It is same as available in other programming languages. So let’s jump into practical directly.
Syntax
while [ condition ]
do
  command1
  command2
  command3
done
commandl to command3 will be executed repeatedly till condition is true. The argument for a while loop can be any Boolean expression. Infinite loops occur when the conditional never evaluates to false. For example, following while loop will print welcome 5 times on screen:
[centos@ip-172-31-37-192 loops]$ cat whilescript.sh
#!/bin/bash

a=1
while [ $a -le 5 ]
do
  echo Number $a
  a=$(( $a+1 ))
done
How To Set Up SSH Keys
SSH keys provide a more secure way of logging into a virtual private server with SSH than using a password alone. While a password can eventually be cracked with a brute force attack, SSH keys a~e nearly impossible to decipher by brute force alone. Generating a key pair provides you with two long string of characters: a public and a private key. You can place the public key on any server, and then unlock it by connecting to it with a client that already has the private key. When the two match up, the system unlocks without the need for a password. You can increase security even more by protecting the private key with a passphrase.
Step One-Create the RSA Key Pair
ssh-keygen -t rsa This will generate a public key. Let’s have a look
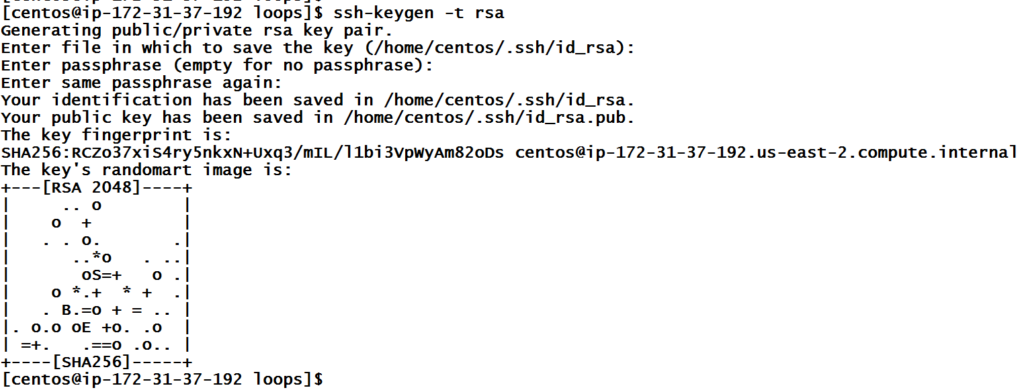
The public key is now located in /home/demo/.ssh/id_rsa.pub. The private key (identification) is now located in /home/demo/.ssh/id_rsa
Step Two-Copy the Public Key
Once the key pair is generated, it’s time to place the public key on the virtual server that we want to use. You can copy the public key into the new machine’s authorized keys file with the ssh-copy-id command. Make sure to replace the example username and IP address below.
ssh-copy-id user@x.x.x.x Alternatively, you can paste in the keys using SSH:
cat ~/ .ssh/id_rsa.pub | ssh user@l92.168.2.5 "mkdir - p ~/.ssh && cat>>
~/.ssh/authorized_keys"
No matter which command you chose, you should see something like:
The authenticity of host '192.168.2.5(192.168.2.5 )' can't be established.RSA key fingerprint is bl:2d:33:67:ce:35:4d:5f:f3:a8:cd:c0:c4:48:86:12 .user@12.34.56.78's password : Now you can go ahead and log into user@192.168.2.5 and you will not be prompted for a password. However, if you set a passphrase, you will be asked to enter the passphrase at that time (and whenever else you log in in the future).
Great content! Super high-quality! Keep it up! 🙂