Amazon Elastic Compute Cloud (Amazon EC2) is a web service that provides secure, resizable compute capacity in the cloud. It allows you to obtain and configure capacity with minimal friction. Amazon EC2 provides developers the tools to build failure resilient applications and isolate them from common failure scenarios.
I assume that we have an IAM user already created which we will use to create an Instance. So as I log in and go to the EC2 Dashboard, I don’t see any running instances.
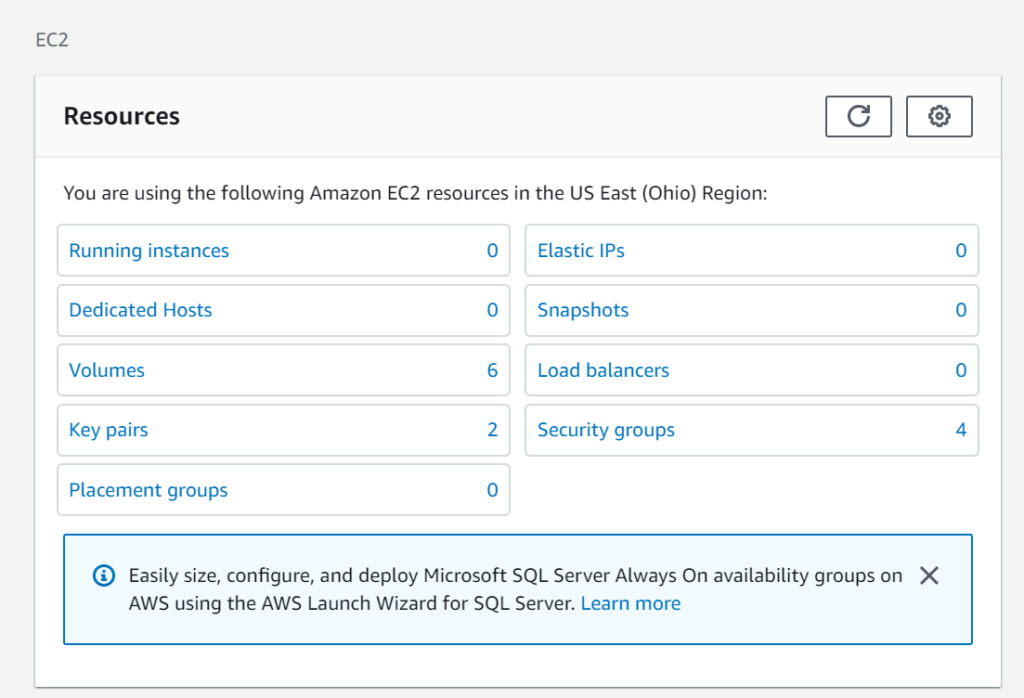
I highly recommend to first create the security group and key pair before creating the Instance. Though we can directly create them during the creation of the instance, it is a good practice to have both of them beforehand available.
Security group acts as a virtual firewall which controls the traffic for one or more instances.
And Amazon EC2 uses a key pair to allow you to log in to the instance. Let’s get started with the steps.
Go to the “Network & Security” section and click on “Security Groups” and then, click on “Create Security Group”.
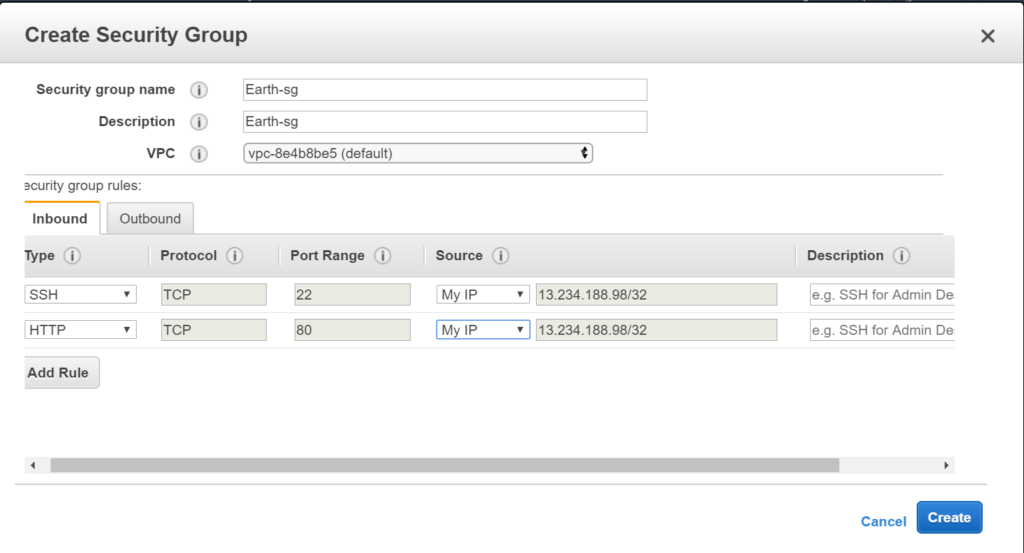
I have given Earth-sg as we are going to use one of the templates called Earth and this Security Group belongs to that application. Finally, click on “Create”. Go to “Network & Security” section and click on Key Pair and then click on “Create Key Pair”.
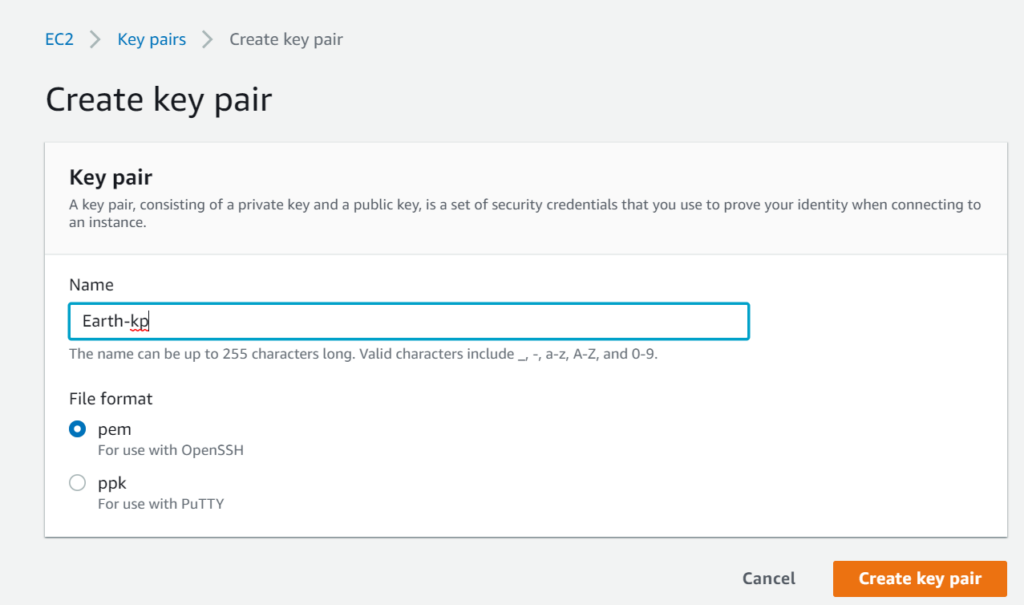
Finally, click on “Create”.
Now, go back to the EC2 Dashboard and click on “Launch Instance”. Then, go to the AWS marketplace on the left side and search for CentOS and select the one which shows 0.0$/hr.
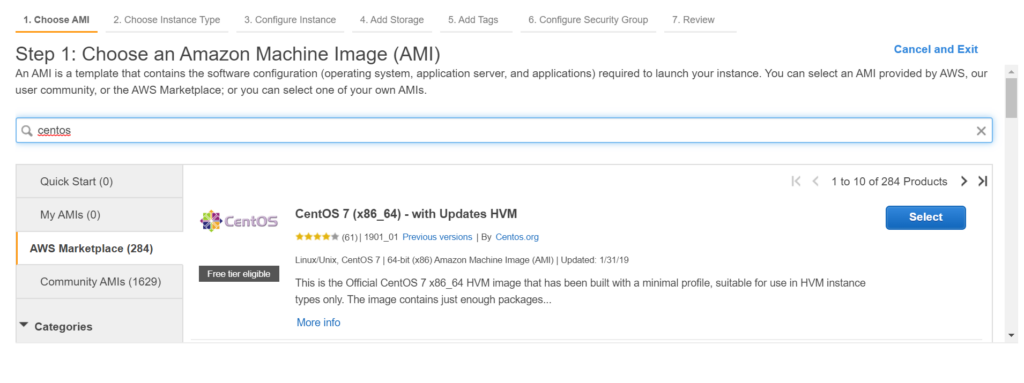
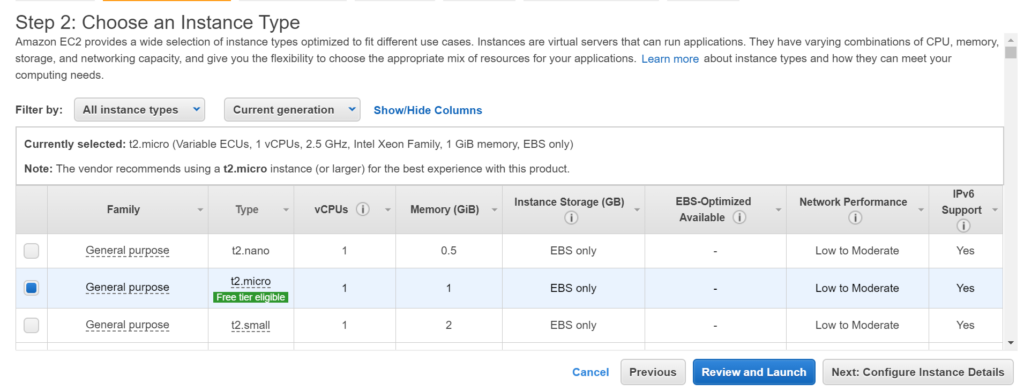
Select this and click on “Continue”. Then, in the “Instance Type” tab, let the default selection of t2.micro instance to be present as it is free. Click “Next”.
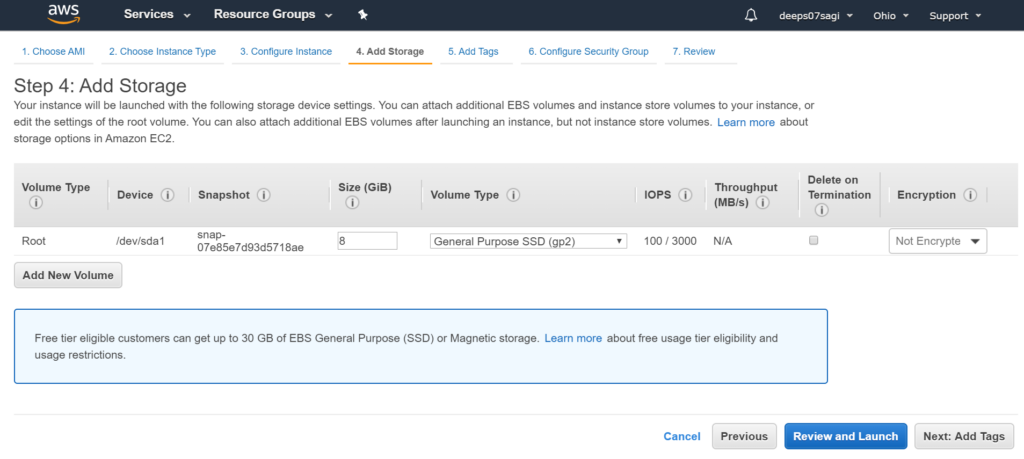
Click “Next”: Add Storage and select Delete on the Termination checkbox as this will also delete the volume associated with the instance once you terminate the instance.
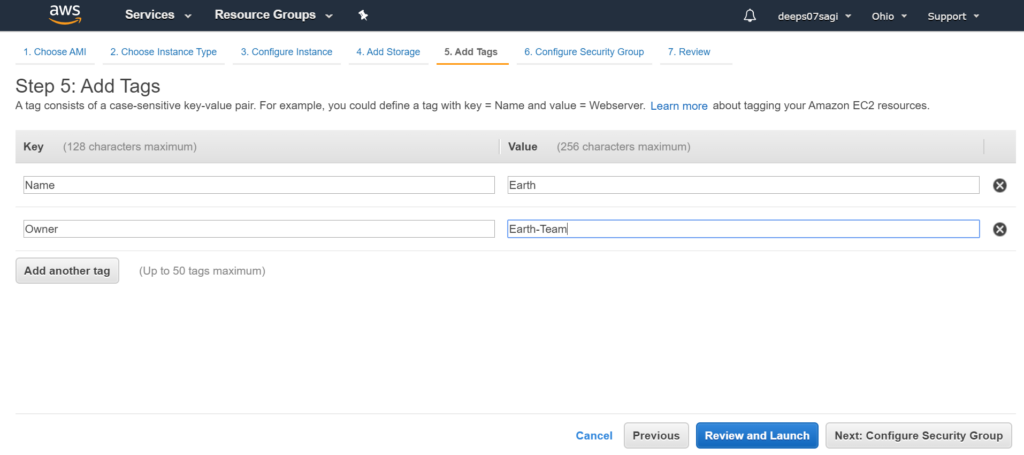
Click on “Next”: Add Tags. Tags are basically key-value pairs which are really helpful for managing, searching your resources and add some tags.
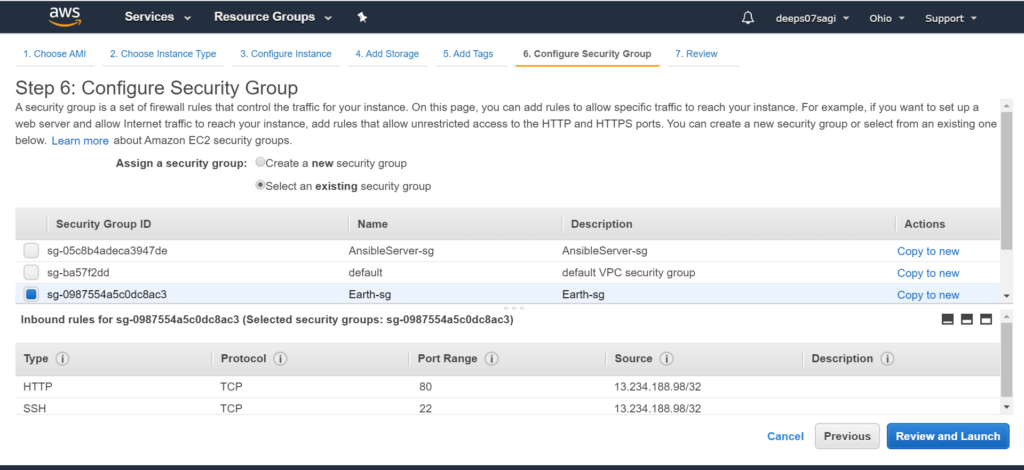
Click on Next: Configure Security Group. Here click on “Select an existing security group” as we already created one and select the one which we created for Earth Project.
Click on “Review and Launch”. Here, you can review all of your details, Security Group, etc. for your instance that is soon going to be launched.
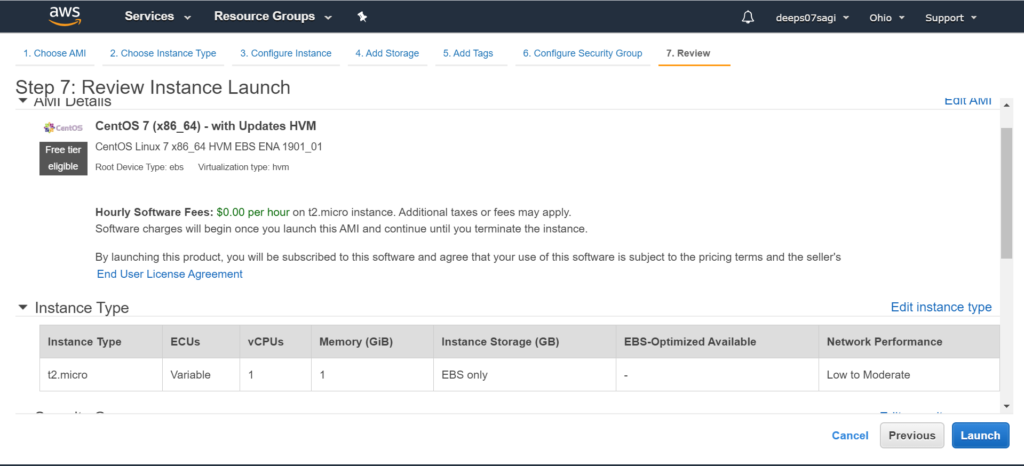
Finally, click on Launch and select the Key Pair that we created earlier.
A key pair consists of a public key that AWS stores, and a private key file that you store. Together, they allow you to connect to your instance securely.
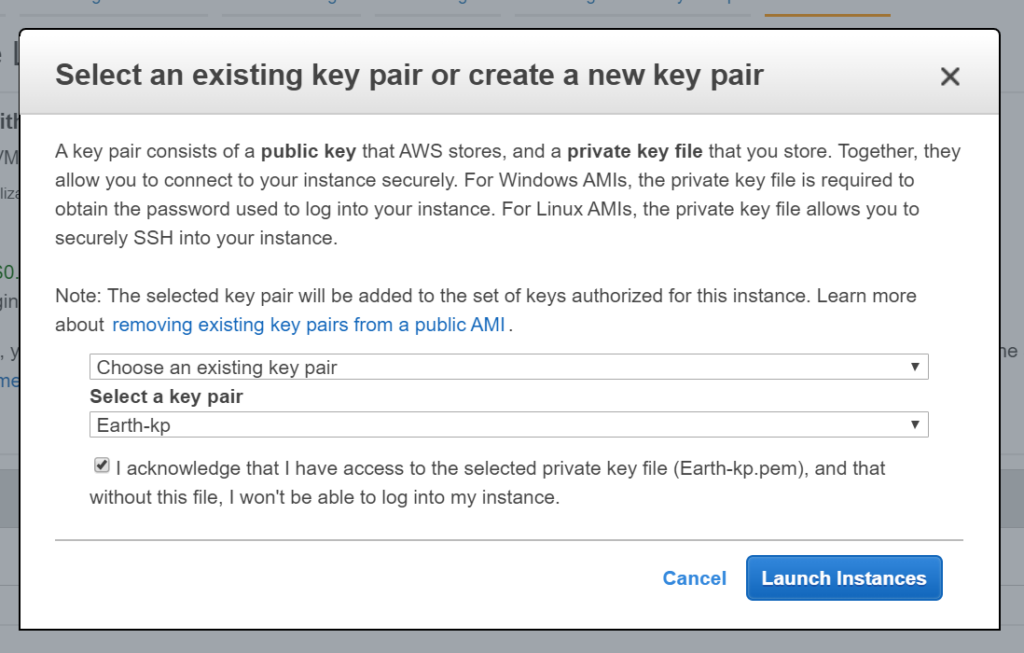
And then hit Launch Instances and this will show us the Launch Status.
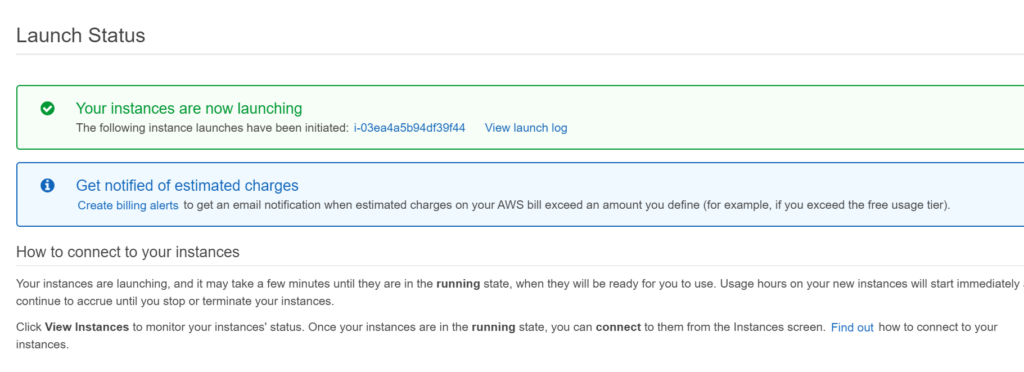
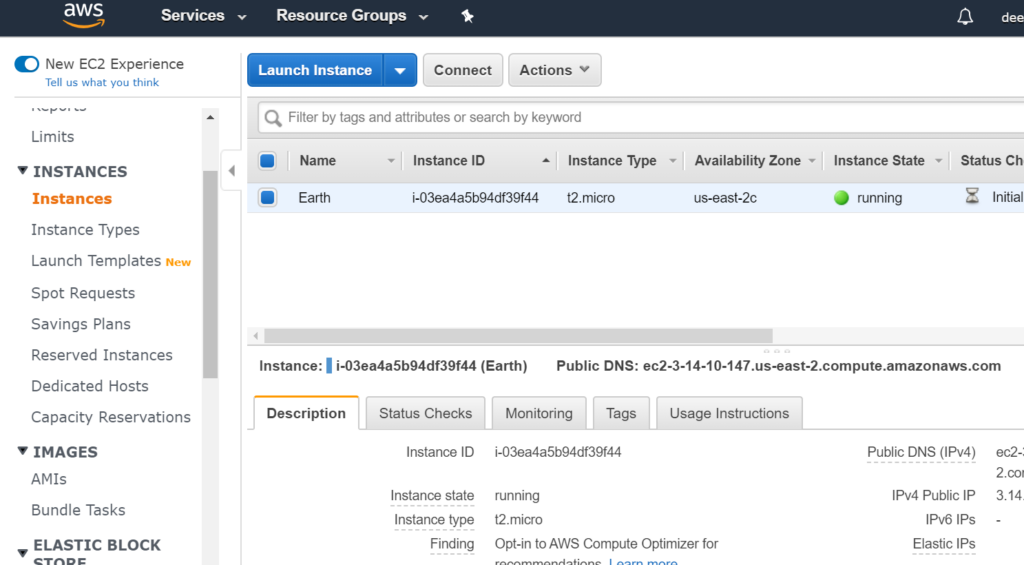
Click on this above link(alpha numeric data) and we will be redirected to the Instances page.
Now, we have to connect to this instance and for this purpose, just open the git bash on your machine. By default, it will not allow you to log in with the root user so just change the above command to as shown below. I have this key pair download in my downloads folder, thus I just changed the path.

Now, we are in our recently created EC2 Instance. Then just switch to root user to install some packages like httpd, wget and unzip.

Once it is complete, just go to https://www.tooplate.com/ and select the Earth template download URL. (https://www.tooplate.com/zip-templates/2113_earth.zip).

Now we can see that it has been downloaded successfully.


Next we have to unzip this zip and copy this to the destination folder.
And we can see that all the files have been copied to /var/www/html successfully. Next is we have to restart the httpd service which will handle the http requests.

Finally, go to the Instances tab on the left and copy the public IP from the description after selecting the instance.
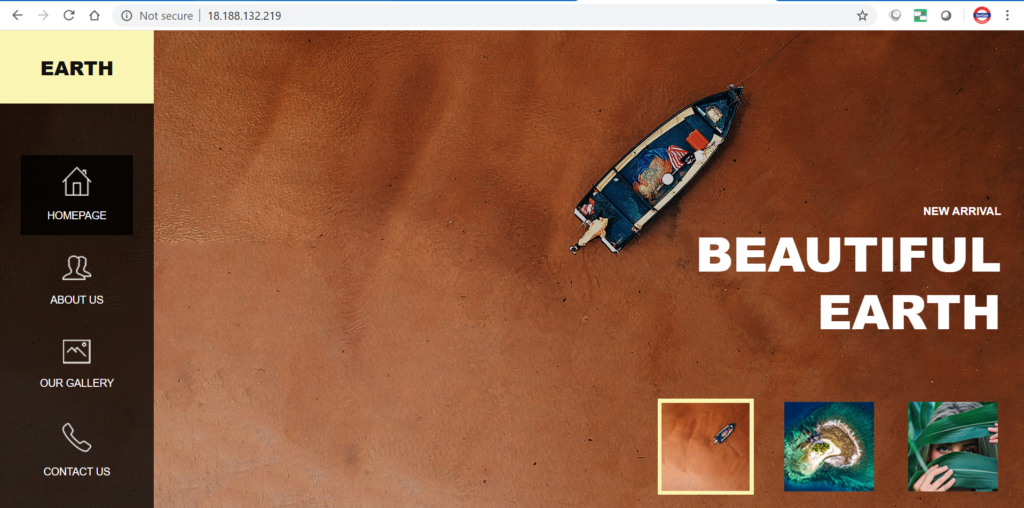
Next is to simply paste this IP on the address bar of your browser and see your sample application running.
I hope you find this article helpful.
