MOUNT DIRECTORY TO A NEW PARTITION
As per our requirement that we discussed in the previous article we need to now mount directory /opt/devdata to a new storage size of 5GB. So, to do this, we will have to create a volume, then attach it to the running EC2 instance. After attaching to the instance, our instance will have one more hard-disk of size 5GB.
Then, we will partition the newly created hard disk and will go to the volumes section under Elastic Block Storage in AWS, and then will create the volume.
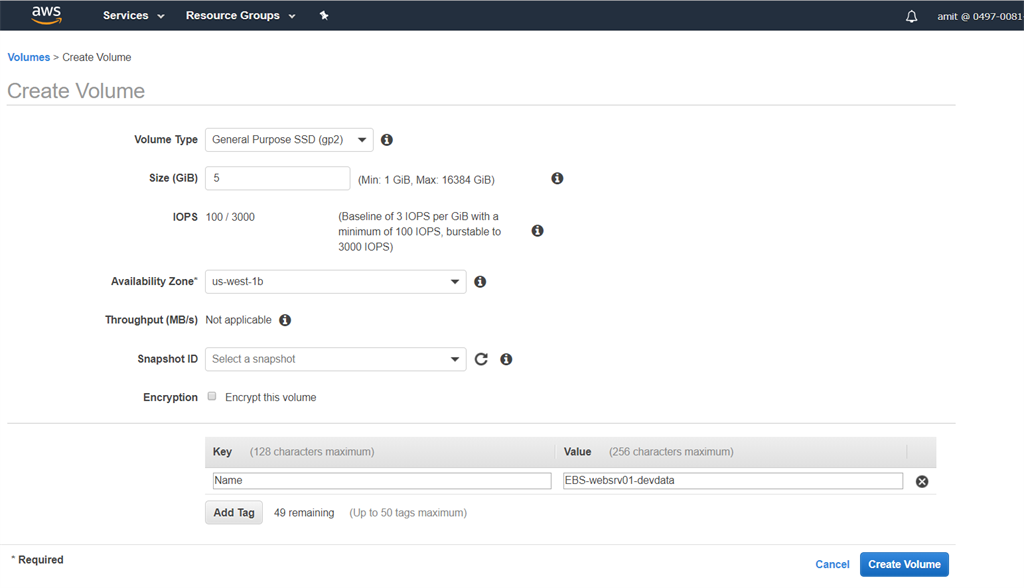
In the “Create volume” section, we will have to select the type of volume. There are different types available and we need to choose them according to our requirement.
CREATING VOLUME
For this, we will keep the volume size as 5GB and will put the tag name as EBS-websrv01-devdata as we are creating this volume to mount to the directory /opt/devdata.
NOTE
While creating volume, we should put the volume in the same availability zone as of the EC2 instances.
As our instance is in us-west-1b zone, so we will create the volume in the same zone.
And, we can see that our volume has been created successfully.

We have named the by default root volume EBS-websrv01-Root which gets created when we created our EC2 instance.
ATTACHING VOLUME
Now as we created the volume now it’s time to attach it to the EC2 instance websrv01. So, for this, we need to select the volume we just created and then from actions choose the option to attach.
Then select the instance in the same availability zone and click on attach.

So, we can see that it has been attached successfully.

Now, log into the EC2 instance websrv01 and switch to root user and run the below command.
fdisk -l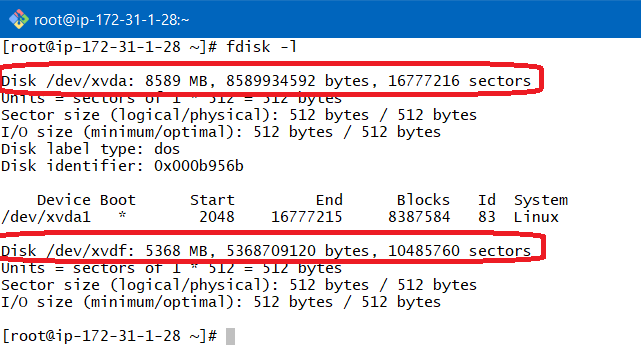
Now we can see that we have one more disk /dev/xvdf with 5GB of storage.
You may be wondering why the new disk name is not /dev/xvdb instead it is /dev/xvdf because there is a separate algorithm which assigns the name of the disk. So, it may be in sequence or may not be.
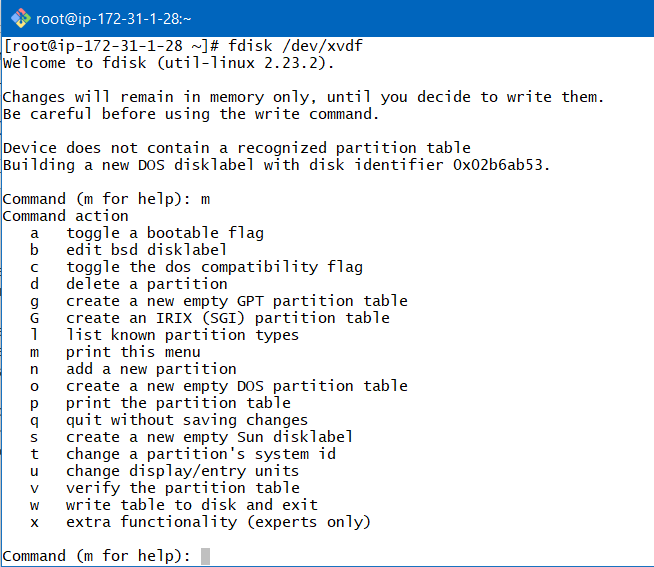
DISK PARTITIONING UTILITY (fdisk)
fdisk is a command-line utility that provides disk partitioning functions in Linux. So we are going to use this with the disk we just got after attaching the volume.
For this, run the below command to create a new partition with the available disk partition.
fdisk /dev/xvdfUse m to list out various options that can be used in fdisk.
Use p to list out the partition information first
Use n to create a new partition.
Follow the steps as shown in the below screenshot.
CREATING PARTITION IN HARDDISK
As we need to create the partition, so we will run the n command . Each disk has 4 primary partition and then has extended partitions.

The hard disk is divided into sectors.
NOTE
Now sectors are used basically to allocate the size in the partition Here we can see that by default sector starts from 2048 and if we are going to select the last sector, this partition will be of the complete hard disk.
As we understand size better in terms of GB and MB, so we can also write +3G, if we want to create a partition of 3GB out of 5GB of the hard disk. We can see from the above screenshot that our first partition of size 3GB is ready.
PRINTING PARTITION
We can print the partition with the p command.
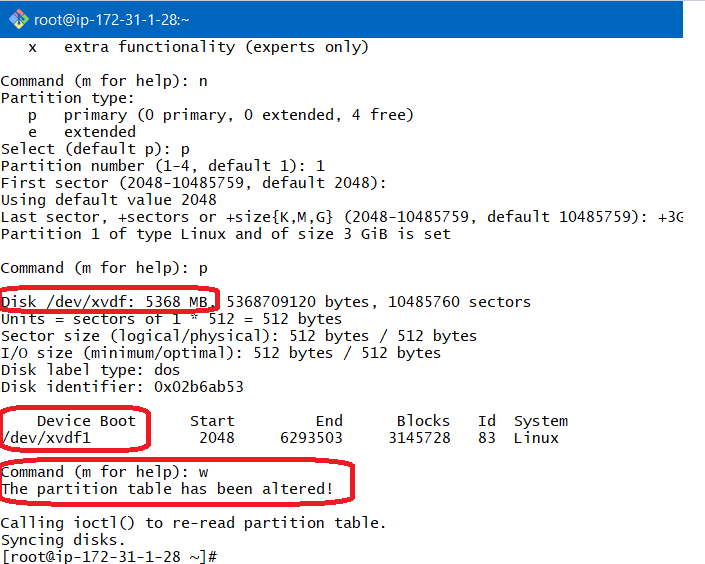
So, we can see that for hard disk /dev/xvdf, we have our first partition created as /dev/xvdf1. As we can see the newly created partition.
So now we are going to write it with the w command and will exit from the fdisk utility.