Let’s first understand the concept of Continuous Integration before jumping to Jenkins.
As we all know that developer would be doing the coding, builds it locally, tests it locally and then pushes the code to Version Control System(Github). In the below example, multiple developers are working on a project, and are pushing their code to a common centralized repository at the end of the sprint, in this case the common repository being Github.

Problem: As the code has been built and tested locally, the code on the Github has been Merged but not Integrated, which means the merged code has not been built and tested as a single component. And now the developer would not have sufficient time to build and test it at the end of the sprint.
Solution: Solution to this problem is really easy. No tool can solve this issue. This issue can be resolved via a mindset and process. BUILD CODE FROM VCS AFTER EVERY COMMIT and every commit has to be tested. And this process is called Continuous Integration.

If there is any failure, the developer will fix the issue and move on to the next task.
There is a tool which can help you to get this process executed. Jenkins fits perfectly in this place.

Jenkins is more than a continuous integration tool. Now a days Jenkins is termed as an Integration tool because of its 2 main features – Open source and extensible. Jenkins is a open source and many developers around the world are contributing to it and Jenkins can be integrated with most of the tools due to the plugins available.
Prerequisite for Jenkins: Java, JRE, JDK and any OS.
Setting Up Jenkins on a EC2 Instance
In this example I am using Ubuntu. Jenkins official documentation is available at https://jenkins.io/
Run the below commands to install Jenkins. After installation Jenkins would be available as a service.
wget -q -O - https://pkg.jenkins.io/debian/jenkins.io.key | sudo apt-key add -
sudo sh -c 'echo deb https://pkg.jenkins.io/debian-stable binary/ > /etc/apt/sources.list.d/jenkins.list'
sudo apt-get update
sudo apt-get install jenkins
To check the status of service run command
systemctl status jenkinsHome directory of Jenkins is /var/lib/jenkins/
Taking Backup of Jenkins
It is recommended to stop the jenkins server before taking the backup.
systemctl stop jenkins
tar -czvf backup_jenkins_01022020 /var/lib/jenkins
systemctl start jenkins
Jenkins is a web based tool accessible on port 8080 by default. Run the jenkins on the IP provided by the EC2 instance with port 8080. Jenkins would ask you a password present at location : /var/lib/jenkins/secrets/initialAdminPassword
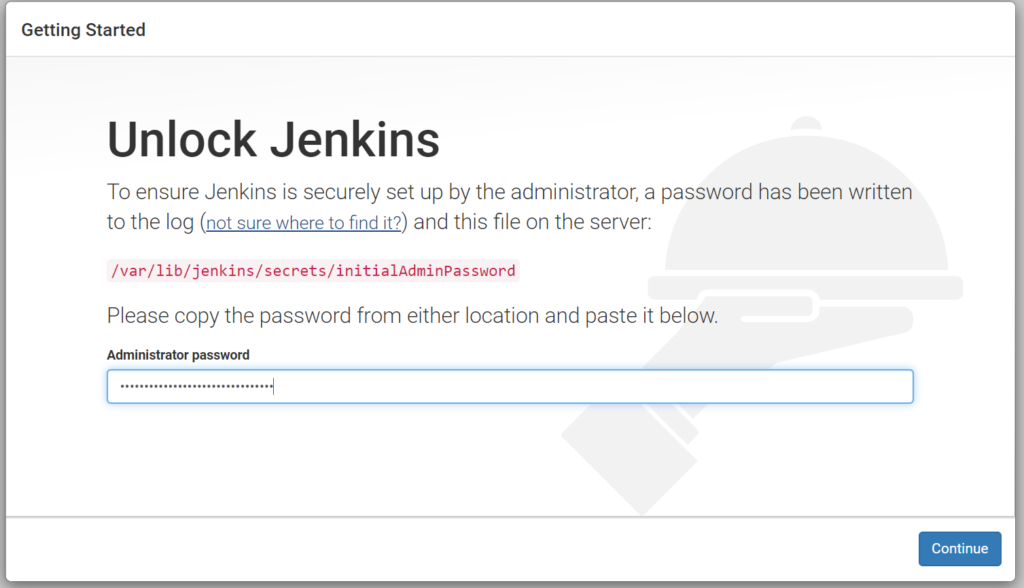
Provide the password, select the plugins you want and we are good to go with the jenkins. Create the first admin user.

Welcome to Jenkins

Creating a New Job
Job is a series of steps that you want to execute for example a build process.
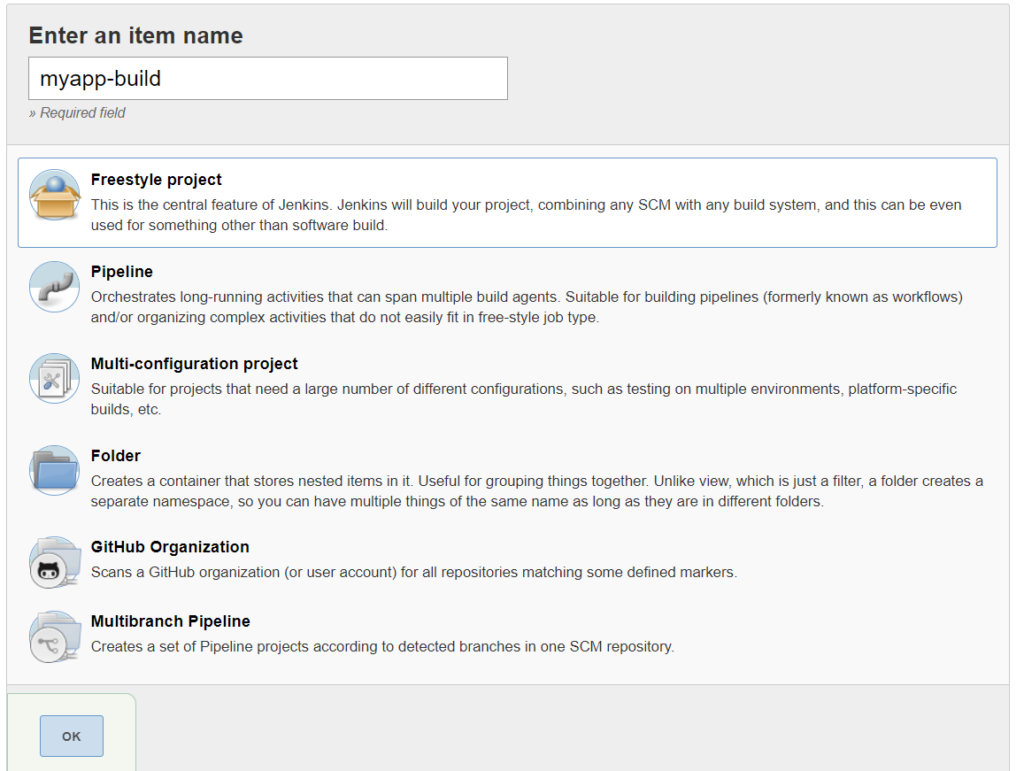
After this a configuration page of the job will appear with few tabs which is self explanatory. Let’s do the minimal configuration and proceed ahead.
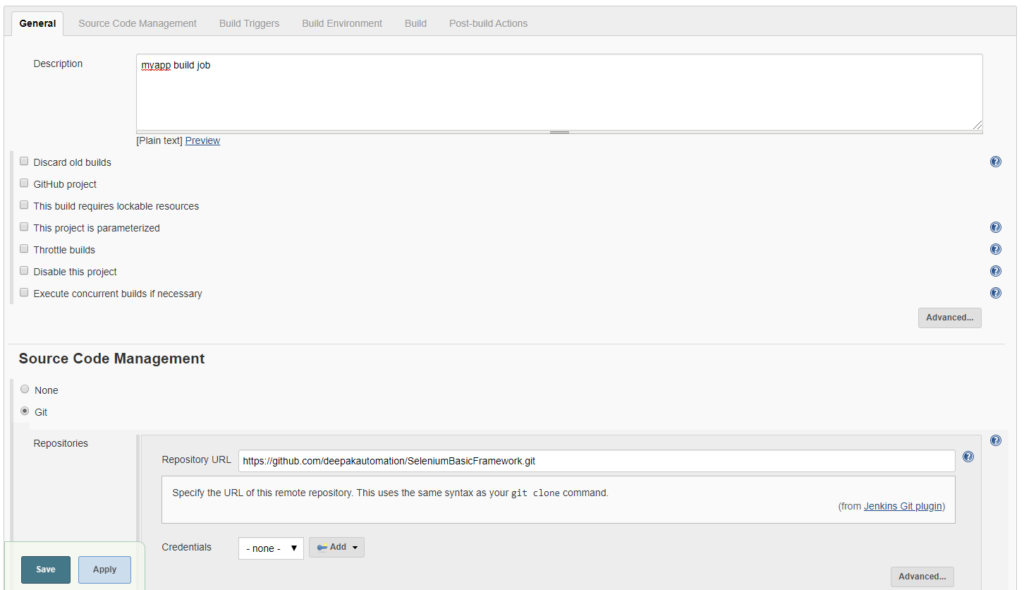
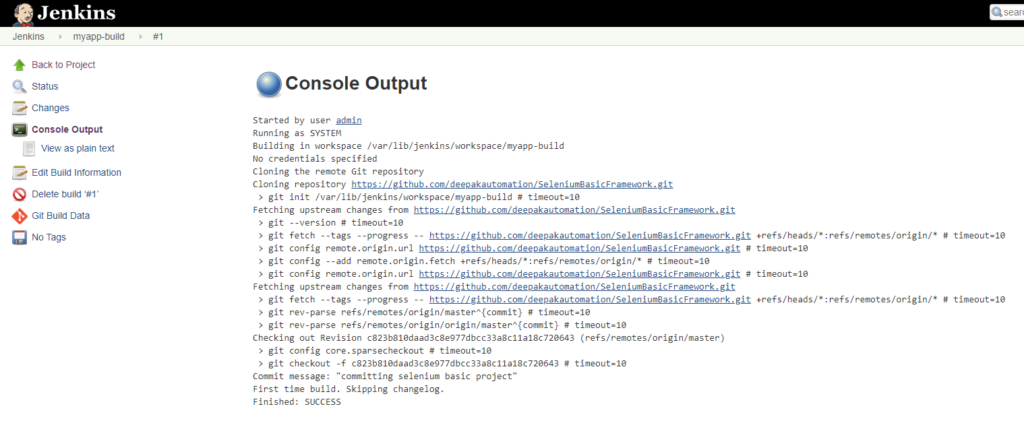
On saving the Job, we will land to the Job page where we will be able to build the job. In the first go i.e on click the build now button for the first time, jenkins will fetch the data and keep it, that’s it.

Building first time has cloned our source code, which is visible in workspace.

Build Id (#1) will store the logs of the build.
Its time to add build configurations in the job.
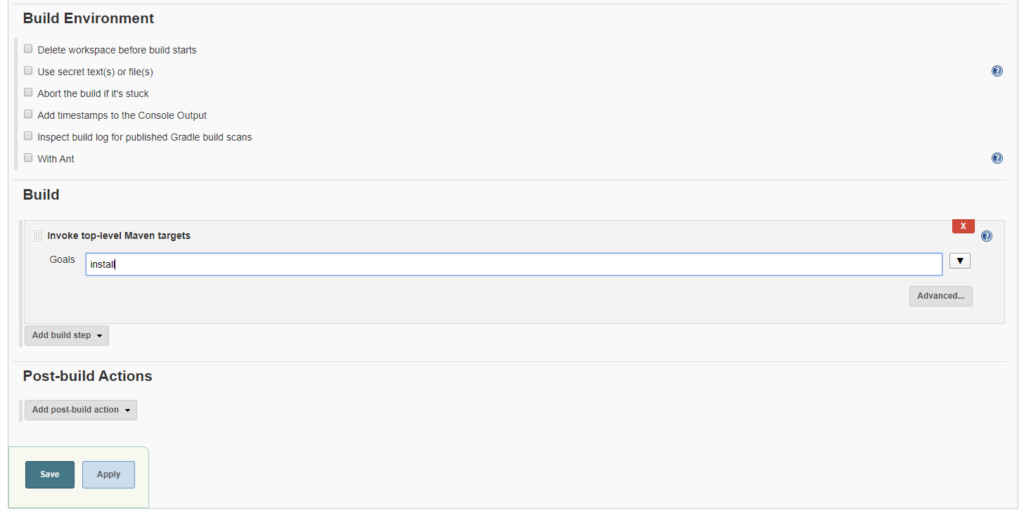
Let’s save and build.
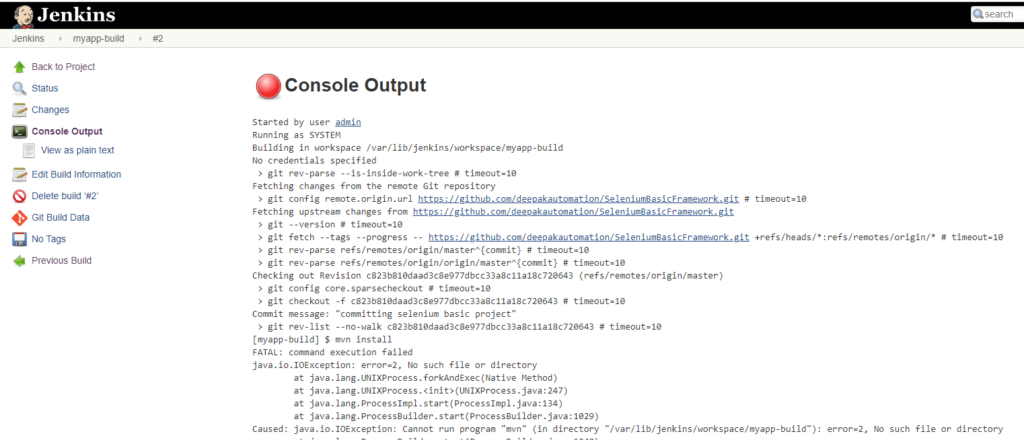
Our build failed because maven has not been installed on our machine. Let’s do it.

Let’s build the job again.

It is a success.
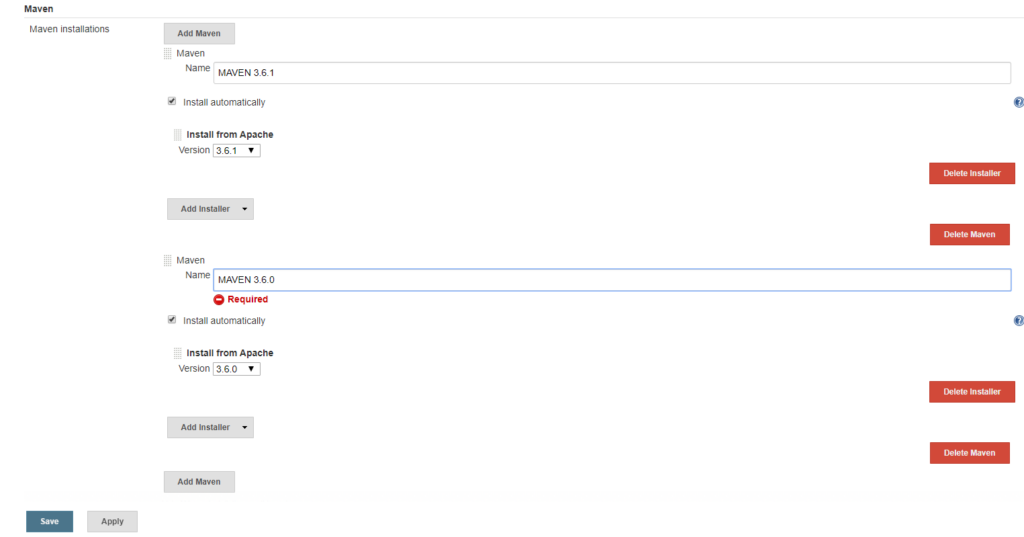
As of now we logged into the machine and setup maven. This can be handled from jenkins tools as well.
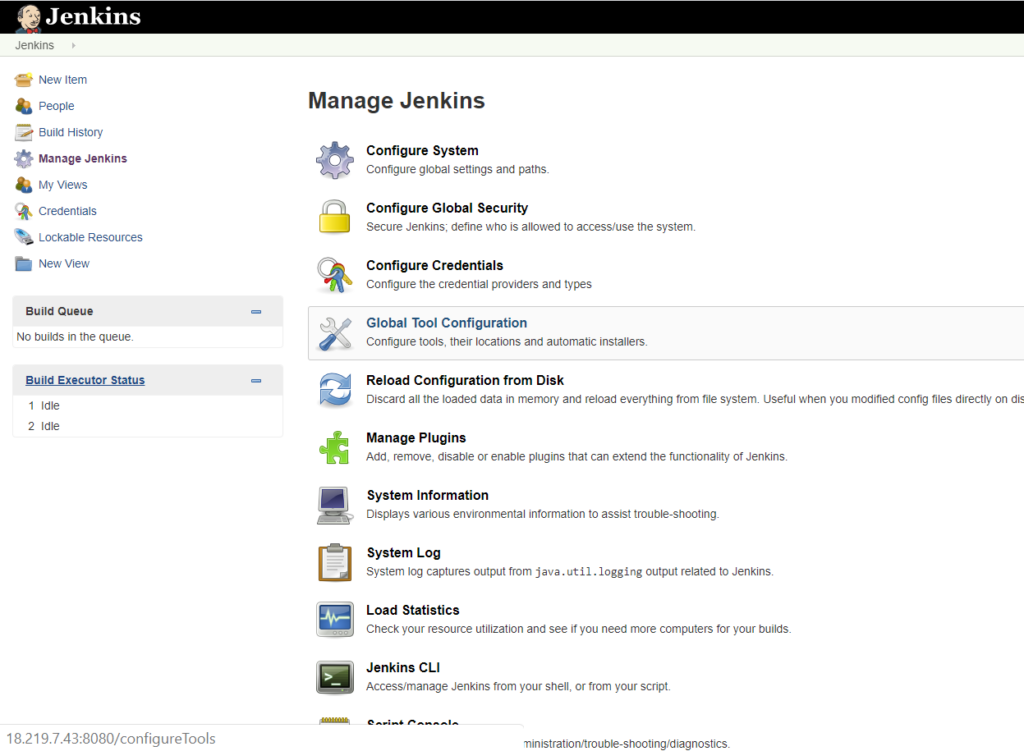
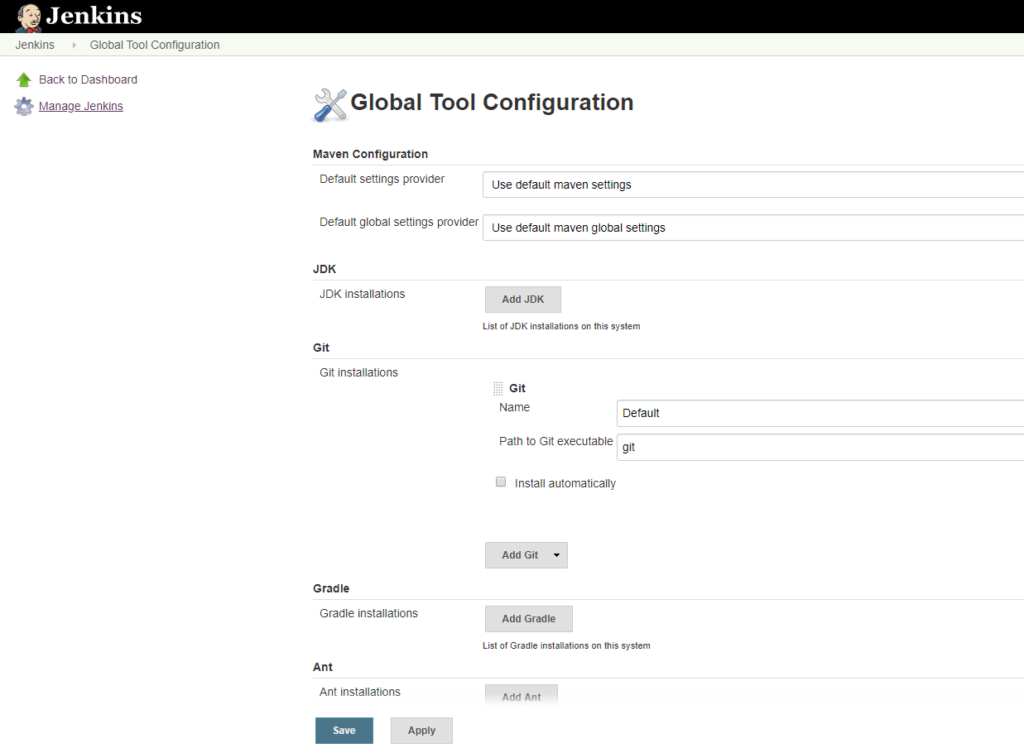

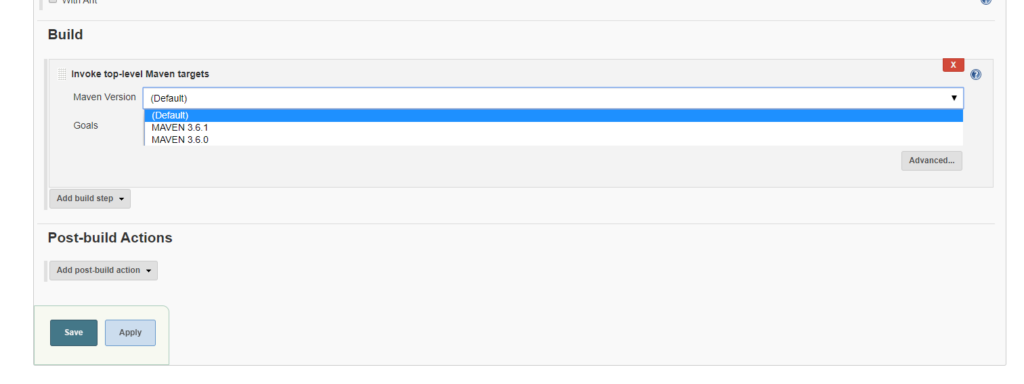
We can add multiple versions of maven. However, that will not install maven. We need to set the maven in the job configuration and while building the job, the respective maven will be installed. Let’s do that.
Jenkins Plugins
Plugins add/enables features in jenkins. We can add plugins to jenkins.
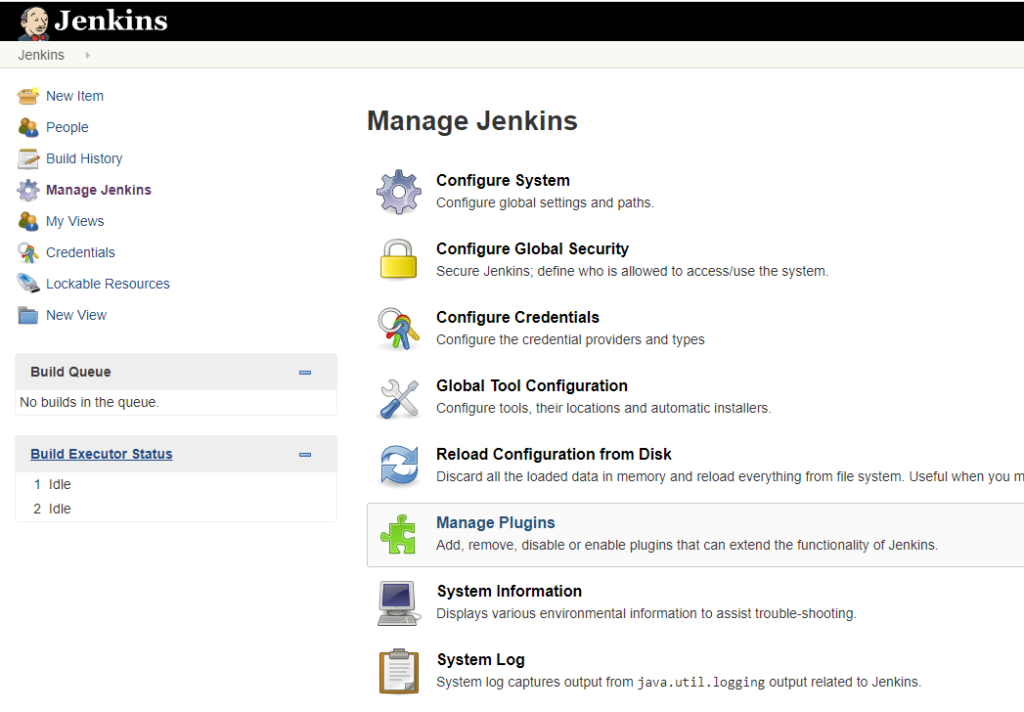
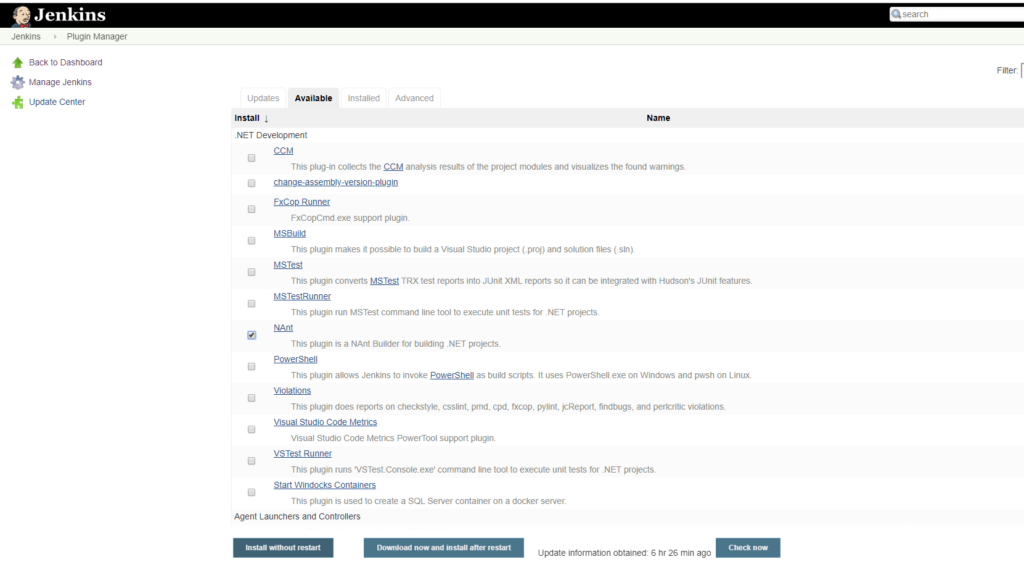
Installed plugins configuration will be visible in Global Tool configuration.
Versioning Of Artifact – Part 1
Artifacts are deployed to the server, let’s say a tomcat. Whenever there is a new build a new artifact is being deployed to the server and the previous artifact would be lost. It would be better if we version our artifacts, so that rolling back to the previous version is simple and easy.
Few important points before we move ahead.
Commands gets executed in the workspace i.e /var/lib/jenkins/workspace/{workspace name}
The commands would be executed via user jenkins and all the files created inside the workspace would have ownership of jenkins.
Everytime when a build is executed, an artifact is generated which is placed in the workspace under the target directory.

Let’s now consider a scenario. Let’s assume there is some issue with the code and the build is triggered. Now the new artifact would override the previous one. The solution to this problem would be versioning the artifacts. Let’s version the artifacts now. For better versioning install a plugin named Zentimestamp. Please check the below settings on Job configuration:

Also, the creation of the artifacts is carried after the build process is completed. Therefore, we can rename the artifact created.
cp target/vprofile-v4.war target/vpro-$BUILD_ID-$BUILD_TIMESTAMP-v4.war
A new artifact would be created upon triggering the build. However, jenkins is not the right place to version the artifacts as its not a storage server/software repository. Going forward we will look into how to version our artifacts in a more better way.


